



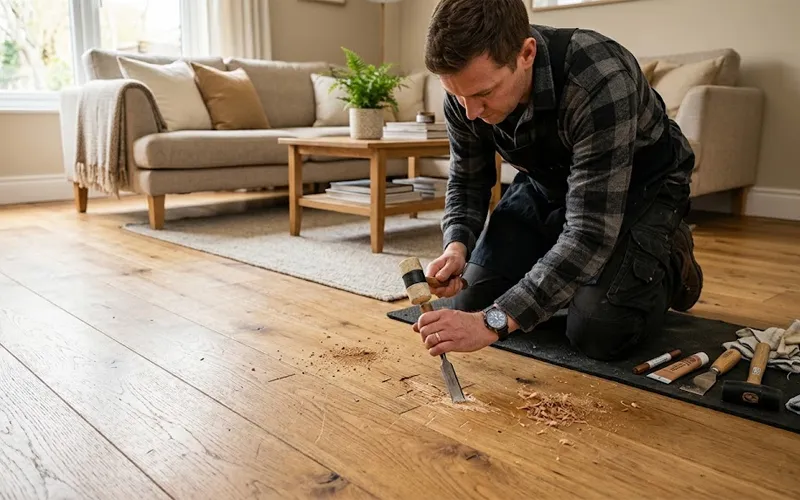
Hardwood floors can make a room feel warm and inviting, but keeping them in good condition takes a little care. Over time, everyday activities leave their mark. Moving a chair, walking in shoes with grit underneath, or spilling water near a doorway can lead to scratches, dents, stains, and loose boards. These problems do not always mean the entire floor needs replacing. In many cases, hardwood floor repair can restore the affected area and extend the life of the existing flooring. The first step is to understand what caused the damage, because a surface mark needs a different solution from a swollen board or a floor that moves when you walk across it.
Understanding the Type of Damage
Before buying repair products or reaching for your tools, take a close look at the floor. A shallow scratch may affect only the protective coating, while a deeper mark can expose the natural wood underneath. Dents usually result from pressure or impact, and gaps between boards may develop as indoor humidity changes. Dark patches, raised edges, or boards that no longer sit flat can point to moisture-related problems.
The flooring material also influences which repairs are safe. Solid hardwood is made from wood throughout its thickness, whereas engineered flooring has a real wood surface attached to several underlying layers. The thickness of that surface determines how much sanding it can tolerate. Checking the manufacturer’s care instructions before starting work can help you avoid using an unsuitable product or damaging a finish that is difficult to restore.
Repairing Scratches and Minor Surface Marks
Scratches are especially common in busy areas such as hallways, dining rooms, and living rooms. Dust and grit can act like sandpaper under shoes, while unprotected furniture legs may leave long marks when moved. If you are learning how to repair scratches on hardwood floor surfaces, start by cleaning the area with a product approved for your flooring. Once the surface is dry, inspect the mark under good lighting to see whether it has affected the finish or penetrated the wood.
For light scratches, a compatible touch-up marker or finish-restoring product may blend the mark with the surrounding surface. Test it somewhere inconspicuous first, as the same shade can look different on floors with different finishes. When considering how to repair hardwood floor scratches that are deeper, check whether the wood itself is exposed. A small gouge may need a color-matched filler followed by an appropriate finishing product, depending on the manufacturer’s recommendations.
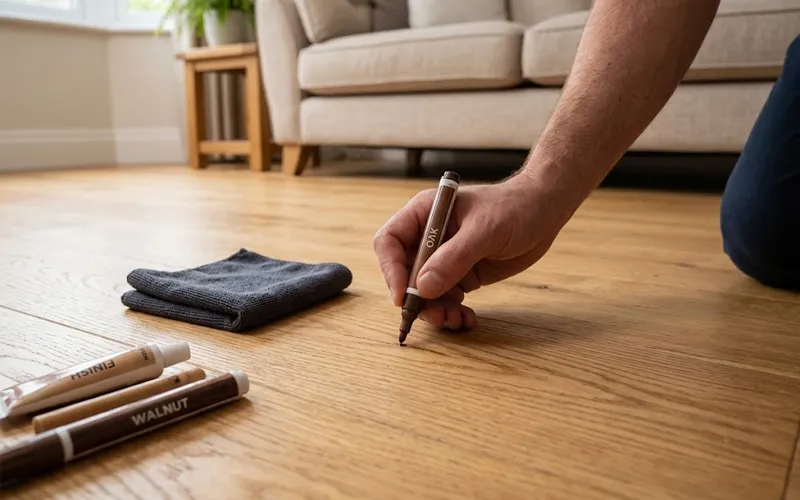
Choosing the right hardwood floor scratch repair method is more important than applying several products at once. Wax sticks and repair compounds can help conceal certain imperfections, but they are not suitable for every finish. A hardwood floor scratch repair kit may include markers, wax fillers, and color-matching options for common cosmetic problems. Before purchasing one, check the instructions and confirm that its contents are compatible with your flooring.
Some hardwood floor repair kits are designed for finished solid wood, while others are intended for laminate or engineered surfaces. These products are not automatically interchangeable. Apply small amounts carefully, allow each product to dry as directed, and compare the result with the surrounding boards before deciding whether another treatment is needed. Avoid abrasive scrubbers and household oils that may leave residue or interfere with future refinishing.
Dealing With Dents and Gouges
A dent differs from a scratch because it compresses the wood rather than simply marking its surface. Dropped objects, heavy furniture, and concentrated pressure can leave noticeable depressions. The right solution depends on the depth of the dent, the wood species, and whether the original finish remains intact.
A shallow dent in suitable unfinished solid wood may sometimes respond to a controlled moisture-and-heat technique. However, this approach is risky on finished surfaces and can damage engineered flooring. Never place a hot iron directly on the floor or apply excessive water in an attempt to raise the wood fibers. A compatible filler or a professional touch-up may be safer, particularly when the finish has cracked or the dent has exposed raw wood.
Deep gouges and broken board edges may need more extensive attention than a simple cosmetic treatment can provide. If the damage affects only one small section, a localized repair can often preserve the surrounding flooring. Matching the color and sheen of an older finish may take extra care, especially when the wood has darkened naturally over the years.
Addressing Moisture and Water Damage
Water can cause more serious problems than ordinary wear because wood absorbs moisture and changes shape as it expands. Leaking pipes, appliance failures, overflowing containers, and repeated wet cleaning can all contribute to wood floor water damage. Early signs include dark stains, raised edges, unusual odors, gaps, and boards that feel uneven underfoot.
Effective hardwood floor water damage repair begins with stopping the source of moisture. Wipe up fresh spills promptly, correct any leak, and allow the area to dry with suitable ventilation. A fan or dehumidifier may help manage indoor humidity, but avoid applying intense heat to speed up the process. Rapid or uneven drying can create additional cracking and movement.
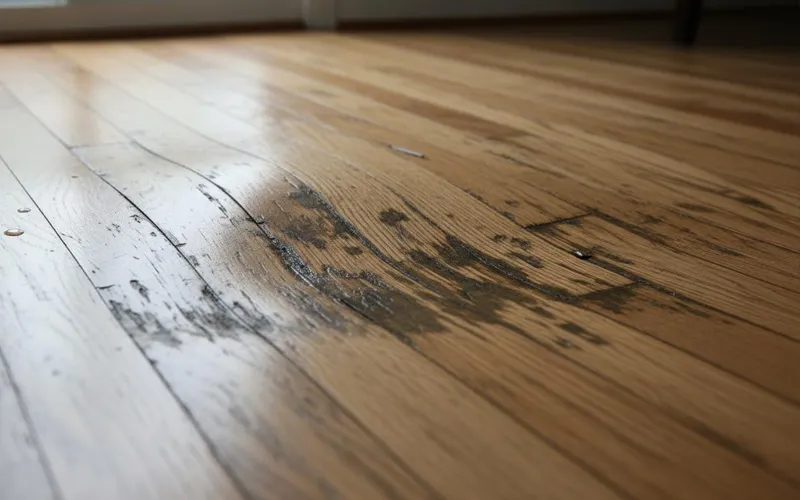
When dealing with a larger spill or plumbing leak, do not assume the floor is dry simply because its surface looks normal. Moisture can remain trapped beneath the boards or inside the subfloor. A moisture meter can help assess drying progress, while a qualified flooring professional can check whether the underlying materials have also been affected.
Homeowners researching hardwood floor repair water damage should wait until the flooring and subfloor are sufficiently dry before attempting permanent repairs. Sanding or sealing damp wood can trap moisture and make the damage worse. Once the area has dried, minor discoloration may improve, while more noticeable stains might require refinishing if the wood remains structurally sound.
Deciding Whether Damaged Boards Can Be Saved
The best way to repair water damaged hardwood floor sections depends on the condition of the individual boards. Slight surface discoloration may be manageable with cleaning or refinishing, but severe buckling, persistent swelling, crumbling edges, and extensive deterioration can make replacement necessary.
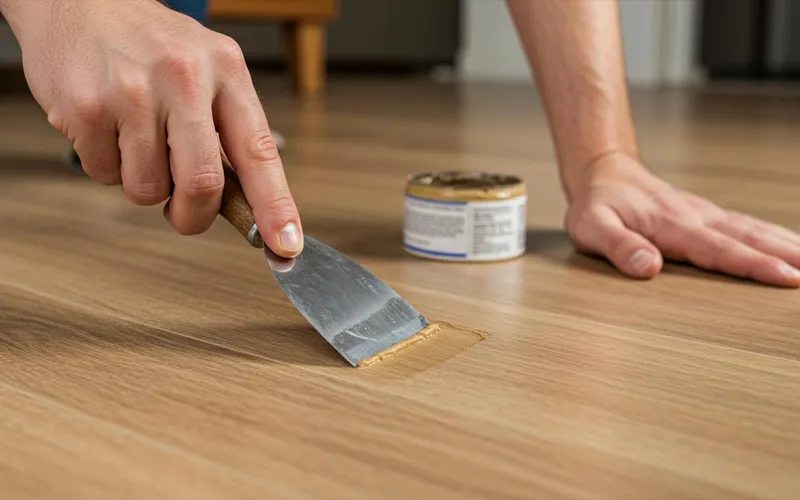
If you need to repair water damaged hardwood floor boards, inspect their stability as well as their appearance. A board that has returned to a flat position may still have a weakened finish or other hidden damage. If several boards have lifted or separated, a professional can determine whether they can be restored or should be removed.
Replacement also requires attention to the material underneath. A soft, swollen, or deteriorated subfloor must be assessed before new boards are installed. Otherwise, the repaired section may develop similar problems again. Matching the replacement wood’s grain, width, color, and finish can take time, particularly when the original flooring is no longer available.
Finding and Fixing Squeaky Boards
A squeaky floor can be annoying, especially in a quiet bedroom or hallway. The noise usually develops when boards, fasteners, or the subfloor move against one another under pressure. Changes in humidity may contribute to the problem, but loose fasteners and gaps in the underlying structure can also be responsible.
Good hardwood floor squeak repair starts with identifying the precise location of the noise. Walk slowly across the area and note whether the sound comes from a single board or a wider section. If the subfloor is accessible from below, a loose connection may be easier to inspect and secure. In other situations, specialized flooring screws can reduce movement without removing large sections of the floor.
If you are wondering how to fix squeaky wood floors, avoid driving ordinary nails into finished boards without knowing what lies underneath. Incorrectly placed fasteners can split the wood, leave visible marks, or damage hidden pipes and cables. Persistent squeaking accompanied by sagging, excessive movement, or a noticeable change in floor level should be assessed by a professional rather than treated as a minor noise problem.
Keeping indoor humidity reasonably stable may reduce seasonal movement, but it will not correct loose structural connections. The lasting solution depends on whether the sound originates in the boards, the fasteners, or the subfloor.
Caring for Engineered Flooring
Engineered wood flooring needs a slightly different approach because its surface layer is thinner than the full thickness of a solid hardwood board. Light surface marks may respond to compatible touch-up products, but deeper damage can be harder to correct without affecting the layers underneath.
Before attempting engineered hardwood floor repair, identify the product and check the manufacturer’s maintenance guidance. Some engineered floors can tolerate limited refinishing, while others are designed for surface-level maintenance only. Sanding without confirming the veneer thickness can expose the underlying material and permanently change the floor’s appearance.
Water exposure deserves particular attention because some engineered boards may swell, separate, or lose their shape when moisture reaches the layered construction. If individual boards have become badly distorted, replacement may be more practical than trying to flatten them. Keeping the original product information, if available, can make it easier to find a compatible replacement.
When Refinishing Is the Better Option
When scratches, dull areas, and worn patches cover much of the room, repairing each mark separately may leave the floor looking uneven. In these situations, hardwood floor repair and refinishing may provide a more consistent result. Depending on the condition of the boards, the work may involve preparing the surface, removing the old finish, sanding where appropriate, cleaning away dust, and applying a new protective coating.
Anyone researching how to sand hardwood floors should understand that sanding requires the right equipment, careful technique, and effective dust control. Removing too much wood can shorten the floor’s lifespan, particularly if it has been refinished several times before. Uneven sanding can also leave marks that remain visible after the new finish has dried.
Full refinishing is not always necessary. If the wood is in good condition and the main problem is a worn protective coating, a professional may recommend a less intensive treatment. The appropriate choice depends on the finish, the extent of wear, and whether the floor can safely be sanded. For widespread damage or valuable older flooring, an assessment before starting work can prevent costly mistakes.
What Affects the Cost of Repairs?
The total hardwood floor repair cost depends on the type of damage, the size of the affected area, labor rates, replacement materials, and the time required to complete the work. A small cosmetic touch-up may cost relatively little, while replacing swollen boards or refinishing a large room can require a substantially higher budget.
The visible damage does not always tell the whole story. A small patch affected by a plumbing leak may need moisture testing and subfloor repairs, making it more complicated than a larger area with superficial scratches. Older flooring can also cost more to match if the original wood species, stain, or finish is difficult to find.
When requesting estimates, ask what the price includes. Materials, preparation, furniture removal, board replacement, finishing, cleanup, and moisture assessment may be charged separately. Comparing these details gives you a clearer picture of the overall expense than looking at the headline price alone.
For straightforward cosmetic problems, a wood floor repair product may be sufficient. More extensive damage usually benefits from a professional assessment so you can compare the cost and expected durability of different options before committing to the work.
Preventing Future Damage
A few simple habits can help hardwood flooring stay in good condition for longer. Place protective pads beneath furniture legs, lift heavy items instead of dragging them, and use suitable mats near entrances to catch grit and moisture. Sweep or vacuum regularly with equipment designed for hard floors to prevent abrasive particles from scratching the finish.
Clean spills promptly and avoid soaking the boards during routine cleaning. Use products approved for your specific flooring, since unsuitable cleaners can leave residue or affect the protective coating. Keeping indoor humidity within the manufacturer’s recommended range can also limit excessive expansion and contraction.
Pay particular attention to areas near sinks, appliances, windows, and exterior doors. Checking these locations occasionally can help you spot leaks, discoloration, or finish deterioration before the affected area grows. If you have pets, keeping their nails trimmed and protecting frequently used paths can reduce repeated surface wear.
Choosing Between DIY and Professional Repairs
Small scratches, minor scuffs, and limited cosmetic imperfections are often manageable at home when you use compatible products and follow the instructions carefully. More complicated problems, including widespread moisture damage, buckling, loose subfloors, and extensive board separation, may require specialist tools or a closer inspection of the floor’s construction.
Before beginning a repair, consider whether you can identify the cause of the problem and whether the proposed method is suitable for your flooring. If you are uncertain about veneer thickness, hidden moisture, or structural movement, getting advice before starting is usually more sensible than risking further damage.
The aim of any repair is to restore the floor without creating a new problem. Choosing a method suited to the material, addressing the underlying cause, and knowing when professional help is needed can make the difference between a temporary cosmetic improvement and a lasting result.
Final Thoughts
Scratches, dents, squeaks, and moisture-related damage do not automatically mean hardwood flooring needs to be replaced. With a careful inspection and the right treatment, many problems can be resolved while keeping the existing boards in place. Timely repairs, appropriate cleaning products, and sensible moisture control can also help prevent minor issues from becoming more expensive projects.
Whether the floor needs a small touch-up, individual board replacement, or refinishing, start by understanding the condition of the wood and the cause of the damage. A practical approach to hardwood floor repair can preserve the floor’s appearance, protect the materials underneath, and help you make informed decisions about its long-term care.
Frequently Asked Question
1. What is the best way to repair hardwood floors?
The best method depends on the damage. Minor scratches can be treated with a touch-up product, while deep gouges, loose boards, or severe water damage may require sanding, board replacement, or professional hardwood floor repair.
2. How can I repair scratches on hardwood floors?
For light scratches, use a suitable wood floor polish or touch-up marker. Deeper scratches may need wood filler and refinishing. Always test the product on a hidden area first.
3. Can water-damaged hardwood floors be repaired?
Yes, minor water damage may be repairable once the floor is completely dry. Warped, swollen, or severely stained boards may need replacement. Fix the moisture source before starting repairs.
4. How do I fix squeaky hardwood floors?
Squeaky floors often result from loose boards or gaps between the flooring and subfloor. Securing loose boards or addressing subfloor movement can help, depending on the floor’s construction.
5. Can I repair hardwood floors without replacing the boards?
Yes, surface scratches, small dents, and minor finish damage can often be repaired without replacing boards. However, severely warped, cracked, or rotted wood may need replacement.
6. What tools are needed for hardwood floor repair?
Common supplies include wood filler, sandpaper, a putty knife, touch-up markers, protective equipment, and a suitable floor finish. Larger repairs may require specialized tools.
7. Is it better to repair hardwood floors myself or hire a professional?
DIY repairs work well for minor scratches and small surface imperfections. Deep damage, widespread water issues, loose flooring, or extensive refinishing are usually better handled by a professional.
8. How much does hardwood floor repair cost?
The cost depends on the type of damage, affected area, materials, and labor. Minor scratch repairs are generally less expensive than replacing damaged boards or repairing extensive water damage. Get a quote for an accurate estimate.
Want more DIY and repair ideas? Explore helpful tips and the latest trends on TrendsMore.com.