



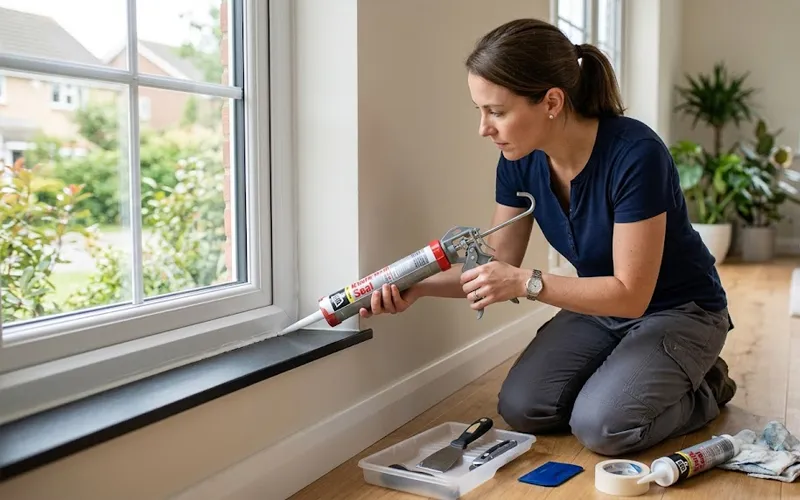
Small gaps around windows can let cold air, dust, moisture, and outdoor noise enter your home. They may also make indoor temperatures uncomfortable and reduce energy efficiency. Fortunately, many minor openings can be repaired without replacing the entire window. The right solution depends on the gap’s location, size, and cause.
Learning how to seal gaps around windows starts with identifying the problem before choosing a repair material. A narrow crack around decorative trim needs a different solution from an opening between the window frame and wall. Using the correct method helps create a durable seal while keeping the window safe and functional.
1. Identify the Problem
Start by examining the window from inside your home. Check the edges of the frame, the surrounding trim, and the areas where the movable sash meets the frame. Look for cracked sealant, missing weatherstripping, loose trim, peeling paint, or signs of moisture damage.
On a windy day, move your hand slowly around the window edges to detect incoming air. A thin strip of tissue paper can also help reveal small drafts. If it is safe, inspect the exterior for damaged sealant or gaps around the surrounding wall.
The location provides useful clues about the cause. A thin crack along the trim may result from normal movement in building materials, while a draft around a closed sash could indicate worn weatherstripping. Loose frames, expanding cracks, or damaged wood may require a more extensive repair.
2. Choose Suitable Materials
The materials you need depend on the type of opening. Paintable acrylic latex caulk is suitable for many small interior cracks around stationary trim. Exterior-grade silicone or another compatible weather-resistant sealant is often better for outdoor joints exposed to rain and temperature changes.
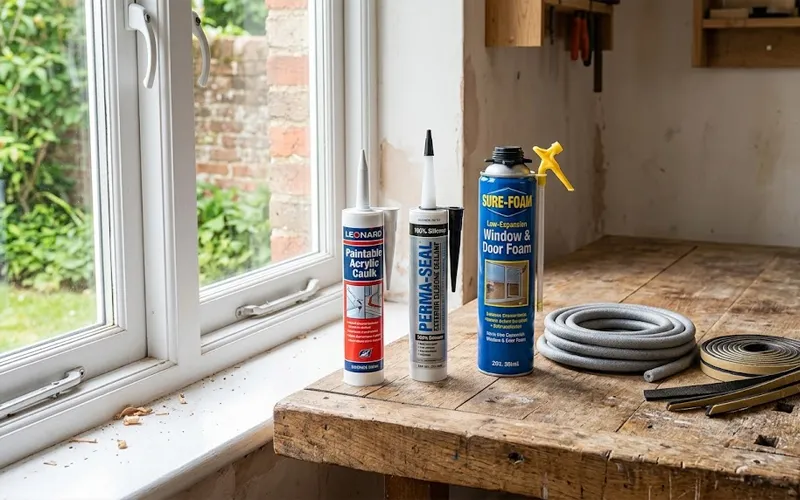
Deeper spaces between the frame and rough wall opening may require low-expansion spray foam designed specifically for windows and doors. A foam backer rod can also support sealant in suitable wider joints. Always check the product instructions to ensure the material is appropriate for the surface and joint size.
When deciding how to seal gaps around windows, remember that one product cannot solve every problem. Sealants are intended for stationary joints, while flexible weatherstripping is generally used where window sections meet and move. Choosing correctly can prevent damage and reduce the need for repeated repairs.
3. Repair Small Trim Cracks
Small cracks around interior window trim are usually straightforward to fix. Begin by removing loose paint, dust, and deteriorated sealant with a suitable scraper. Work carefully to avoid damaging the trim or surrounding wall, then make sure the surface is clean and dry.
Cut the caulk nozzle at a slight angle and apply a steady bead along the crack. Move the nozzle slowly to create an even line without leaving empty spaces. Smooth the material with a caulking tool or another method permitted by the manufacturer’s instructions.
This is a practical way to how to fill gaps on window trim without removing the entire frame. Choose a paintable product if you want the repaired area to match the surrounding wall or trim. Allow it to cure according to the label before painting.
Avoid applying a thick layer over a damaged joint simply to hide the crack. If the gap keeps returning, check whether the trim is loose or the surrounding material is moving. Addressing the cause will usually provide a better result than repeatedly adding fresh caulk.
4. Fill Deeper Frame Gaps
A large gap between window frame and wall may extend beyond the visible surface, allowing air to travel through an uninsulated space. Before filling it, inspect the opening for loose material, deteriorated foam, damaged timber, or signs of water intrusion. Remove only material that is loose or damaged.
For suitable deep openings, low-expansion window-and-door foam can fill empty spaces and reduce air leakage. Apply it carefully in controlled amounts because it expands as it cures. Excessive expansion can put pressure on the frame and interfere with the window’s operation.
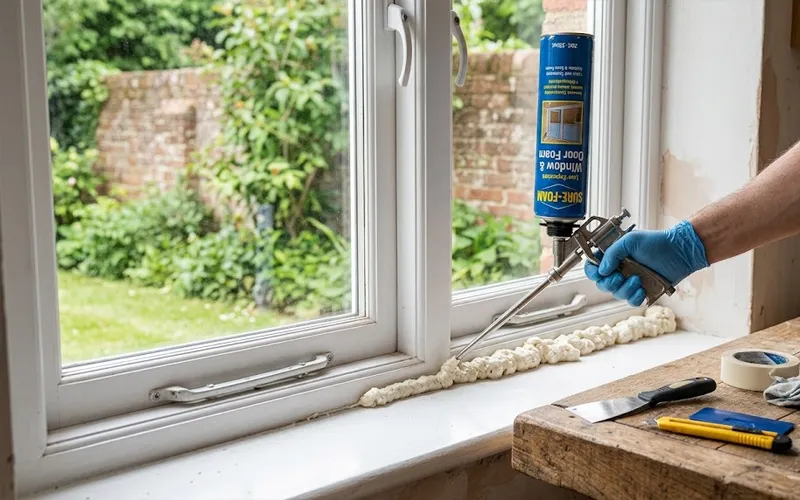
A backer rod may be appropriate for a wider joint that needs support before sealant is applied. Once the filler has cured, finish the exposed area with a compatible material if required by the repair method.
Proper filling gaps around window frames means sealing the opening without concealing structural damage. If the frame moves, the surrounding masonry is crumbling, or the opening is unusually wide, investigate the underlying problem before proceeding.
5. Try Alternatives to Caulk
If you prefer a removable solution, there are several ways to reduce drafts without applying permanent sealant. For suitable indoor applications, window insulation film can create an additional barrier over the window area during colder weather. Removable draft seals may also help with certain temporary gaps.
Self-adhesive weatherstripping is useful around movable window sections when the original seal has worn out. It comes in different thicknesses and materials, including foam, rubber, and flexible plastic. Measure the opening before purchasing a replacement so it fits without preventing the window from closing or locking.
If you are exploring How to seal gaps around windows without caulk, choose an option that suits the location and purpose of the opening. Clean the surface before applying adhesive products, and follow the manufacturer’s fitting instructions.
These alternatives are most useful for temporary indoor protection or suitable moving joints. They are not a substitute for repairing damaged frames, deep wall openings, or failed exterior weatherproofing. Avoid using paper, ordinary household tape, or fabric as a permanent solution because these materials may deteriorate or trap moisture.
6. Protect Exterior Joints
Outdoor gaps need materials that can withstand rain, sunlight, temperature changes, and movement between building materials. Inspect the joint for cracked sealant, loose paint, damaged siding, or rotting wood before beginning. If water is entering behind the frame, correct the source of the leak rather than covering it with a new layer of sealant.
To understand how to fill gaps around windows outside, remove deteriorated sealant and loose debris, then allow the joint to dry. Apply an exterior-grade product compatible with the window frame and surrounding surface. Follow the manufacturer’s guidance on joint preparation, application thickness, and curing time.
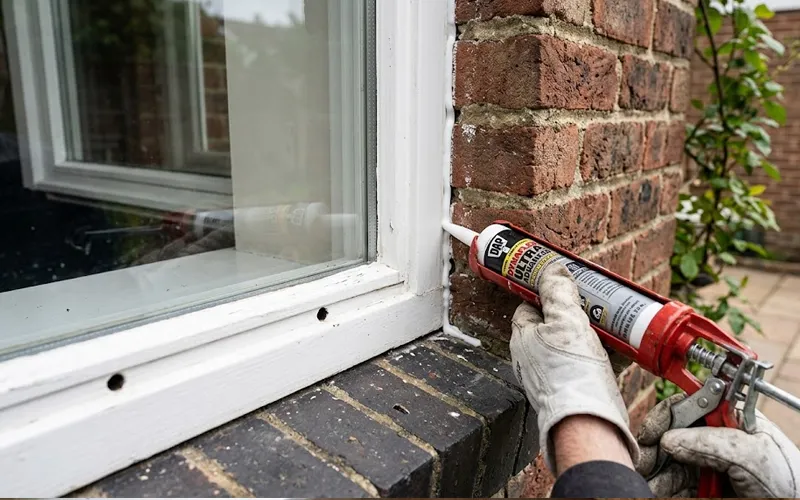
Wider joints may need a backer rod to support the sealant and help it form a suitable shape. Do not apply new material over wet or unstable surfaces, as poor adhesion can cause the repair to fail.
Pay particular attention to the bottom of the window. Some designs have drainage channels or weep holes that allow water to escape. Blocking these openings can trap moisture inside the wall and lead to further damage. If you are unsure which areas should remain open, consult the manufacturer’s installation instructions or a qualified installer.
7. Check the Window Closure
Air entering around a closed window does not always mean the surrounding frame needs caulk. A gap between window and frame when closed may result from worn weatherstripping, loose hardware, misaligned hinges, or a sash that no longer fits correctly.
Close and lock the window normally, then inspect how evenly the sash meets the frame. Look for flattened seals, missing sections, or visible spaces around the edges. If the weatherstripping is damaged, replace it with a compatible type recommended for the window model.
If the gap appears at one corner or the window feels difficult to close, check the alignment and hardware. Do not seal a movable joint with caulk, because doing so may prevent the window from opening properly in an emergency.
A window that closes securely and compresses its weatherstripping evenly is better equipped to keep cold air and dust outside. Persistent misalignment, loose hinges, or cracked frames may need professional adjustment or repair.
8. Avoid Common Repair Mistakes
One mistake is choosing a filler before identifying the cause of the gap. Caulk may work for a narrow trim crack, but it will not correct a misaligned sash or repair a rotting frame. Select the repair method according to the actual problem rather than the appearance of the opening.
Another mistake is applying sealant to dirty, wet, or unstable surfaces. Even a suitable product can lose adhesion when the surface has not been prepared properly. Follow the instructions for cleaning, application temperature, and curing time.
Using too much spray foam is another avoidable problem. Foam intended for general construction may expand excessively and place pressure on the frame. Use a low-expansion window-and-door product and apply only the amount recommended.
Finally, never block drainage openings or seal joints that must remain open or flexible according to the window design. If moisture stains, mold, or recurring gaps appear, investigate the source rather than covering the same area again.
9. Maintain the Seal
Inspect your windows at least once a year and whenever you notice new drafts or moisture marks. Look for cracked caulk, shrinking sealant, loose edges, and damaged weatherstripping. Checking before colder or wetter seasons can help you identify problems early.
Keep window tracks clean and make sure drainage channels remain clear. Dirt can interfere with smooth operation, while blocked drainage may allow water to collect in places where it can cause damage.
If the same gap repeatedly returns, or you discover extensive water damage or a loose frame, consider professional advice. A lasting repair should address the underlying cause rather than simply cover the visible opening.
Conclusion
Knowing how to seal gaps around windows helps you choose the right repair for each situation. Use paintable caulk for suitable interior trim cracks, low-expansion foam for appropriate deep openings, exterior-grade sealant for exposed joints, and weatherstripping for movable sections. Careful preparation and correct application can reduce drafts, keep dust outside, and protect surrounding materials from moisture.
Frequently Asked Questions
1. What is the best material for sealing window gaps?
Paintable caulk works well for many small interior cracks, while compatible exterior sealant, low-expansion foam, or weatherstripping suits other types of openings.
2. Can window gaps be sealed without permanent products?
Yes. Removable draft seals, insulation film, and suitable weatherstripping can help reduce drafts in certain situations.
3. What should I do about a very wide opening?
Check its depth and cause first. A suitable backer rod or window-and-door foam may help, but structural damage should be repaired before sealing.
4. Is expanding foam safe around windows?
Low-expansion foam designed for windows and doors is generally suitable when used according to the manufacturer’s instructions.
5. How can I prevent rain from entering around a window?
Repair damaged exterior joints with compatible weather-resistant sealant, but keep all required drainage openings clear.
6. Why does cold air enter when the window is closed?
Worn weatherstripping, poor alignment, damaged hardware, or a poorly fitted sash can allow drafts around the closed window.
7. Can I paint over repaired window cracks?
Yes, if you use a paintable sealant and allow it to cure according to the product instructions before painting.
8. When should I call a professional?
Seek professional help if the frame is loose, the surrounding material is damaged, water keeps entering, or the same gap repeatedly returns.
Want more DIY and repair ideas? Explore helpful tips and the latest trends on TrendsMore.com.