



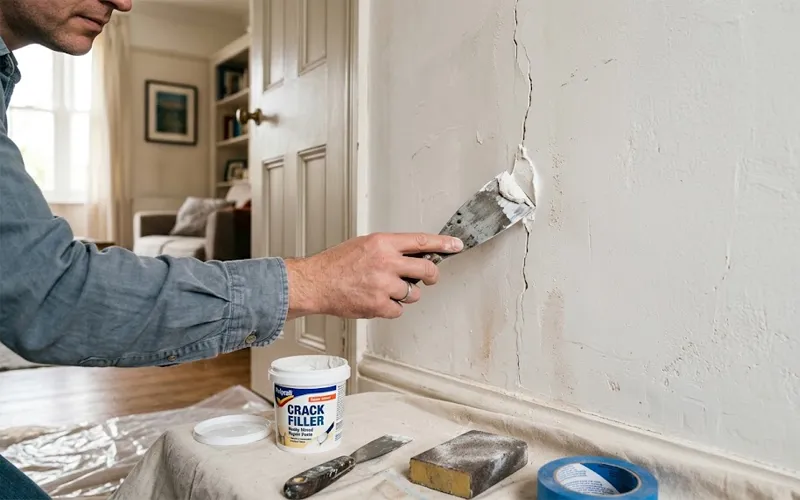
Cracked plaster walls can make a room look neglected, even after a fresh coat of paint. Hairline cracks, deep gaps, and loose plaster may develop because of building movement, moisture, temperature changes, or aging materials. Painting over damaged plaster without repairing it can leave visible lines and an uneven finish.
Learning how to repair cracked plaster walls before painting helps create a smooth surface and improves the durability of the paintwork. The right approach depends on the size of the crack, the condition of the plaster, and the cause of the damage. With suitable materials and proper preparation, many minor cracks can be repaired without professional assistance.
1. Identify the Cause of the Cracks
Before starting repairs, examine the damaged area to understand why the crack developed. Small cracks may result from natural building settlement, temperature fluctuations, or plaster becoming brittle over time. These are common around doors, windows, corners, and ceiling joints.
Understanding why is plaster cracking when drying can also help prevent similar problems. Fresh plaster or filler may shrink if it dries too quickly, contains too much water, or is applied in layers that exceed the manufacturer’s recommended thickness.
Moisture from leaking pipes, damaged roofs, or poor ventilation can weaken plaster and cause it to separate from the underlying surface. Resolve any leaks before repairing the wall. If cracks continue to widen, appear alongside sticking doors, or occur with bulging plaster, seek a professional assessment to rule out structural problems.
2. Prepare the Damaged Surface
Move furniture away from the work area and cover the floor with a protective sheet. Wear safety glasses and a suitable dust mask while scraping or sanding. In older homes, check for potentially hazardous paint or building materials before disturbing the surface.
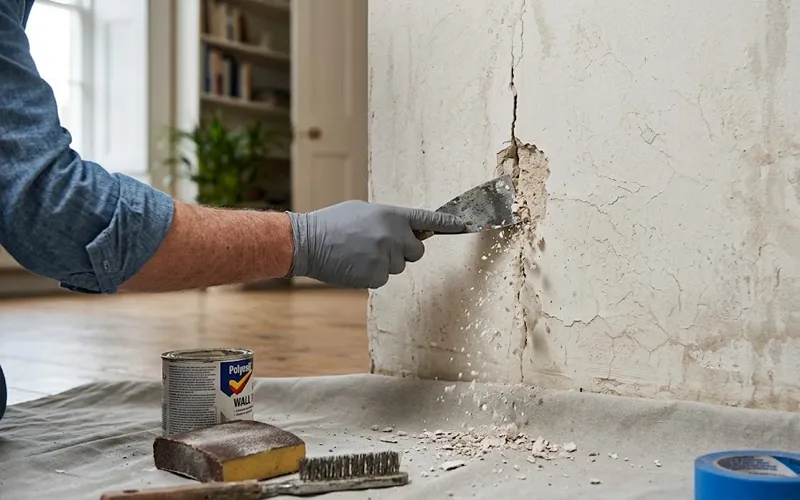
Use a scraper or filling knife to remove loose plaster, flaking paint, and weak material around the crack. Check the surrounding area for sections that sound hollow or appear detached. These areas may require additional repair rather than simple surface filling.
Brush or vacuum away the dust so the repair compound can bond properly. Follow the product instructions to determine whether the surface needs a primer or another preparation treatment. Do not apply filler over damp plaster, loose debris, or an unstable surface.
3. Select the Appropriate Repair Material
Choosing the correct product helps prevent premature cracking and makes the finished repair easier to paint. Fine surface filler is generally suitable for small, stable cracks, while deeper gaps may require a compatible deep-fill compound or repair plaster.
A plaster crack repair kit can be convenient for minor household repairs. Depending on the product, it may include filler, reinforcement tape, and basic application tools. Check the packaging to ensure the kit is appropriate for the plaster type and the depth of the damage.
For cracks that repeatedly appear along joints, paper or fiberglass mesh tape may help reinforce the repair when used with a compatible compound. However, reinforcement cannot correct structural movement or replace damaged plaster that has separated from the wall.
4. Fill Small and Medium Cracks
For stable cracks, use a filling knife to press the repair compound firmly into the damaged area. Remove excess material and smooth the surface so the repair blends gradually into the surrounding plaster.
Deeper cracks may need several applications. Allow each layer to dry as directed before adding more material. Applying too much filler at once can cause shrinkage, uneven drying, or a shallow depression after the compound hardens.
If you need to know how to repair cracks in textured plaster walls, pay attention to the existing surface pattern. Once the filler has dried, recreate the texture with a suitable sponge, brush, or texture tool. Test the technique on a small area first to achieve a closer match before painting.
5. Deal with Large or Deep Cracks
Larger cracks require careful inspection before filling. Remove unstable material and determine whether the surrounding plaster remains firmly attached. Use a repair plaster or deep-fill compound suitable for the depth of the damage, following the manufacturer’s application instructions.
Homeowners researching how to fix large cracks in walls should distinguish between cosmetic damage and signs of continuing movement. Cracks that keep widening, run diagonally from windows or doors, or appear alongside uneven surfaces may indicate a more serious issue. Have these problems assessed before attempting a permanent repair.
Once the underlying cause has been addressed, fill the damaged section using the appropriate repair system. Apply reinforcement if required, and build up the surface in manageable layers. Allow the material to cure fully before moving on to finishing work.
6. Repair Cracks in Plaster Ceilings
Ceiling cracks may develop because of normal building movement, moisture, or deteriorating plaster. Minor, stable cracks can often be repaired with a suitable ceiling repair compound, but sagging or detached plaster needs more attention.
If you are learning how to fix cracks in plaster ceiling surfaces, check for roof leaks, plumbing problems, and other sources of water damage first. Correct the cause and allow the area to dry completely before repairing it.
Protect yourself from falling debris during preparation. Fill stable cracks according to the product instructions, using thin layers where recommended. If the ceiling is sagging, has extensive damage, or feels unstable, stop work and contact a qualified professional rather than attempting a cosmetic repair.
7. Sand and Prepare the Wall for Painting
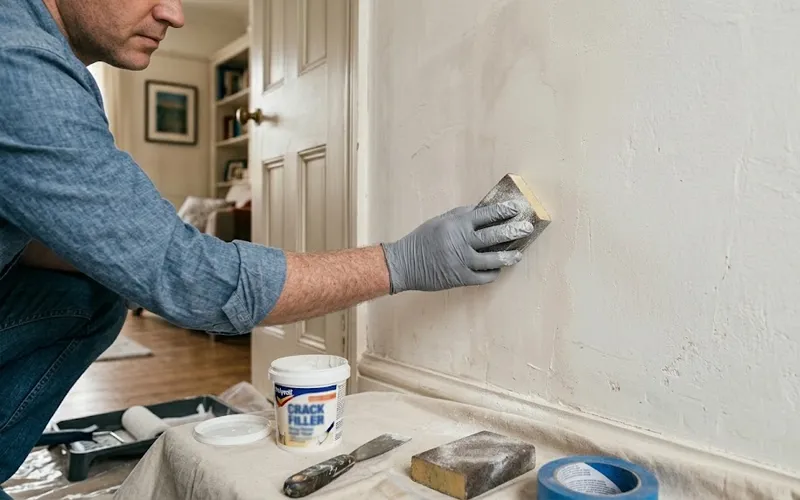
After the repair material has dried completely, lightly sand the surface with suitable fine-grit sandpaper. Use gentle movements to remove ridges and blend the repaired area into the surrounding wall. Avoid excessive sanding, which can damage the plaster or create an uneven depression.
Remove all dust with a brush or vacuum. Inspect the surface under good lighting to identify any remaining gaps, rough edges, or shallow areas. Correct these imperfections before applying primer.
Apply a primer compatible with the repaired surface and your chosen paint. Fresh filler can absorb paint differently from the surrounding wall, so priming helps produce a more uniform finish. Allow the primer to dry according to the manufacturer’s instructions before painting.
8. Apply Paint and Prevent Future Damage
Once the primer has dried, apply a suitable interior paint using the recommended technique. Depending on the existing color, paint type, and coverage, two coats may be necessary. Allow each coat to dry according to the product instructions.
To reduce the likelihood of future cracks, repair leaks promptly, maintain adequate ventilation, and avoid rushing plaster repairs. Follow the recommended mixing ratios and application thickness for every repair compound. Painting over damp filler or incompletely dried plaster can compromise the finish.
Monitor previously damaged areas for changes over time. A stable hairline crack may only require a minor cosmetic repair, but recurring or widening cracks should be investigated rather than repeatedly covered with filler.
Final Thoughts
Knowing how to repair cracked plaster walls before painting makes it easier to achieve a smooth, professional-looking finish. The process involves identifying the cause, preparing a stable surface, selecting suitable repair materials, filling the damage correctly, and allowing sufficient drying time.
Small cracks are often manageable as a DIY project, while extensive damage, persistent moisture, loose ceilings, and signs of structural movement may require professional attention. By addressing the underlying problem and preparing the surface properly, you can improve the appearance of your walls and help the paint finish last longer.
Frequently Asked Questions
1. How to repair cracked plaster walls before painting?
Remove loose plaster and dust, fill the crack with a suitable repair compound, and let it dry. Sand the surface smooth, apply primer, and then paint.
2. How can I fix cracked plaster walls permanently?
Identify the cause, repair the damaged area with a suitable compound, and use reinforcement tape if needed. Widening or recurring cracks may require professional inspection.
3. Why is plaster cracking when drying?
Plaster may crack because of excess water, rapid drying, incorrect application thickness, or temperature changes. Follow the product’s mixing and drying instructions to prevent cracks.
4. How do you repair cracks in textured plaster walls?
Fill the crack with a suitable compound and let it dry. Recreate the original texture using a sponge or brush, then apply primer before painting.
5. What is the best plaster crack repair kit?
Choose a plaster crack repair kit suitable for the crack’s size and depth. Check whether it includes filler and reinforcement tape for your specific repair needs.
6. How do you fix large cracks in walls?
Remove loose material and fill the crack with a suitable repair plaster. If the crack keeps widening or indicates structural movement, consult a professional.
7. How do you fix cracks in a plaster ceiling?
Check for leaks and loose plaster before repairing minor cracks with a suitable ceiling compound. Have sagging or unstable ceilings inspected by a professional.
8. Do I need to prime plaster after repairing cracks?
Yes, primer helps prevent uneven paint absorption and visible repair patches. Apply it after the filler has dried completely and the surface has been sanded.
Want to read more articles like this? Explore more home improvement ideas, helpful tips, and the latest updates on TrendsMore.com.