



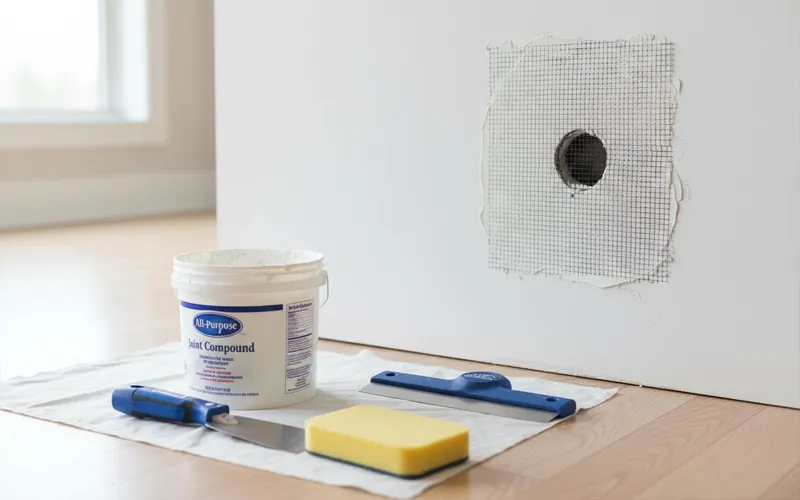
Drywall holes can develop when furniture hits a wall, a door handle strikes the surface, or nails and screws are removed. The right repair method depends on the size of the opening and the condition of the surrounding material. Small holes usually need only spackle or joint compound, while larger openings may require a patch or a replacement piece of drywall. Learning how to fix a hole in drywall step by step helps you choose the right materials and restore the wall without replacing more of it than necessary.
Before starting, check whether the drywall is firm, dry, and free from other damage. A simple surface repair is usually enough for a clean hole, but soft drywall, water stains, or recurring cracks may indicate a problem that needs attention first. Choosing a suitable repair method and preparing the area correctly will help you achieve a durable finish.
Check the Hole Before Repairing It
Examine the damaged area to determine how much material needs to be removed. Small nail holes and screw holes can generally be filled directly, while larger openings may have broken edges or damaged drywall paper. Remove loose fragments with a utility knife, but avoid cutting away solid material unnecessarily. For a larger opening, mark the damaged area so you can prepare a neat shape for the patch.
Check for electrical wires, plumbing pipes, and other hidden utilities before cutting or drilling into the wall. If the hole is near an outlet or switch, take extra precautions and seek professional help if you cannot safely identify what is behind the drywall. When moisture has caused the damage, repair the leak or other source first and let the wall dry completely. Wet or weakened drywall should not be covered with a patch.
Gather the Necessary Tools and Materials
The materials you need depend on the repair method. Small holes usually require spackle or joint compound, a putty knife, fine sandpaper, primer, and matching paint. Medium-sized openings may need a self-adhesive mesh patch, while larger repairs generally require replacement drywall, suitable screws, backing strips, joint tape, and a wider taping knife.
A drywall patch kit can simplify repairs because many kits include a patch and basic application instructions. Some contain adhesive mesh, while others use a metal-backed patch. Check the manufacturer’s recommended hole size before choosing one. A patch designed for a small opening may not provide enough support for extensive damage.
Keep a measuring tool and utility knife available when working on larger holes. Using the correct tools makes it easier to create clean edges, fit the replacement material accurately, and apply joint compound without leaving unnecessarily thick layers.
Repair Small Holes With Filler
Small nail holes, screw holes, and shallow dents are usually straightforward to repair. Start by removing dust and loose debris from the opening. Use a putty knife to press a small amount of spackle or joint compound into the hole, then scrape away the excess so the surface remains level with the surrounding wall.
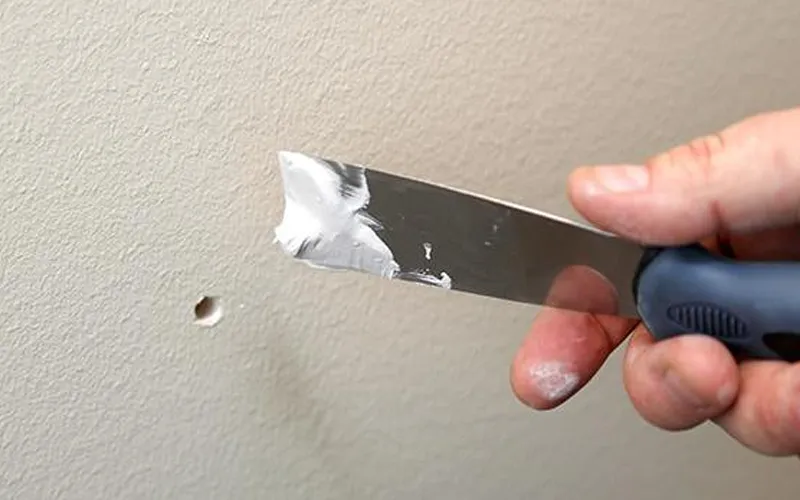
For effective drywall small hole repair, follow the product’s drying instructions before sanding. Deeper holes may shrink as the filler dries, leaving a slight depression. If this happens, apply another thin layer and allow it to dry before continuing. Avoid filling a deep opening with one excessive application because thick material can shrink unevenly.
Once the filler is dry, sand it lightly with fine sandpaper until the surface is even. Remove the sanding dust and inspect the repair. Small holes generally do not need tape or a separate patch unless the surrounding drywall is damaged or the opening is larger than it first appeared.
Patch Medium-Sized Holes With Mesh
A mesh patch can cover openings that are too large for ordinary filler but do not require a supported replacement piece. Trim away broken drywall and loose paper until the edges are firm. Clean the area and make sure the patch can sit flat against the wall.
Position the patch over the opening according to the product instructions. For a self-adhesive patch, press it firmly into place. Spread a thin layer of joint compound over the mesh with a putty knife, extending the compound beyond the patch edges to blend it into the surrounding surface. Let the layer dry before applying another coat if the mesh remains visible or the surface is uneven.
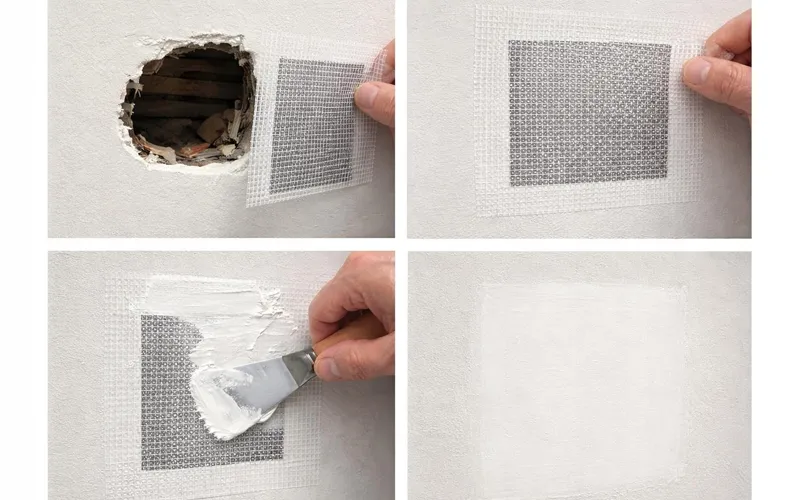
When learning how to patch a large hole in drywall with mesh, check the patch’s size limits carefully. Mesh patches are useful for suitable small and medium openings, but they are not the best choice for every large hole. If the opening is wide or the surrounding drywall is weak, a supported replacement section will usually provide a more reliable repair.
Fix Holes Larger Than Six Inches
Openings wider than six inches often need a replacement piece of drywall because a simple surface patch may not provide enough support. If you are researching how to fix a hole in drywall bigger than 6 inches, the first step is to create a clean opening that removes all damaged material without unnecessarily enlarging the repair.
Mark a square or rectangular outline around the hole. Before cutting, check for hidden wiring and plumbing. Cut along the marked lines with an appropriate drywall saw or utility knife, using caution around anything concealed inside the wall.
If the opening does not have suitable support at its edges, install backing strips behind the drywall. Secure the strips to sound material or suitable framing with appropriate screws, leaving enough of each strip exposed to support the replacement piece. If the existing framing is damaged, the repair may require additional work before the new drywall can be installed.
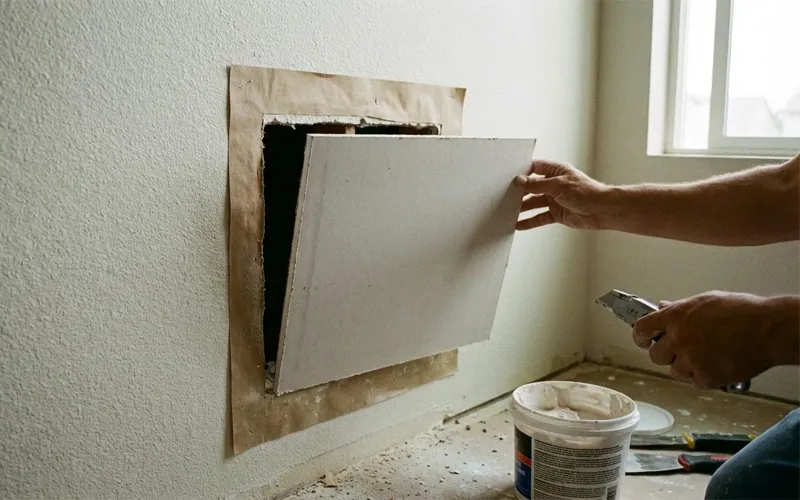
Measure the opening and cut a piece of drywall to match. Test the fit before fastening it to the backing strips or framing. The replacement should sit level with the existing wall, with no need to force it into the opening. Drive the screws securely without breaking through the drywall’s paper surface.
Cover the joints with suitable drywall tape and spread joint compound over the seams. Apply the first coat to embed the tape, then use additional thin coats to widen and smooth the transition. Allow each coat to dry according to the product instructions. A larger repair may require several applications to conceal the joints properly.
Smooth and Finish the Repaired Area
After the joint compound has dried, sand the surface gently with a sanding sponge or suitable sandpaper. Concentrate on removing raised edges and ridges without exposing the tape or damaging the surrounding drywall paper. For a large repair, feathering the compound outward over a wider area helps the new section blend into the wall.
Inspect the surface from different angles. A work light placed beside the wall can reveal shallow dips, bumps, and uneven seams that may be difficult to see under normal lighting. If you find an imperfection, apply a small amount of compound to that spot, let it dry, and sand it again.
Use a clean, dry cloth or suitable dust-removal method to remove sanding residue. The surface should feel smooth and appear even before you move on to painting. This is particularly important around taped seams, where small ridges can become more visible under paint.
Apply Primer and Matching Paint
Apply a suitable drywall primer to the repaired area and allow it to dry as directed. Fresh joint compound absorbs paint differently from an existing painted wall, so skipping primer can leave a dull or uneven patch. Priming creates a more consistent surface for the final finish.
Choose paint that matches the wall’s color and sheen. Apply it with a brush or roller appropriate for the surface, following the manufacturer’s instructions. Depending on the color difference and paint coverage, you may need more than one coat.
Older paint can fade over time, which makes an exact match difficult even when you use the original paint color. If the repair remains visible after the paint dries, repainting the entire wall from corner to corner can provide a more uniform appearance. Textured walls may also require the texture to be recreated before painting.
Common Drywall Repair Mistakes
Using too much joint compound in one application can create raised areas and make sanding more difficult. Thin, even coats provide better control, especially when covering taped seams or blending a replacement piece into the existing wall.
Choosing an unsuitable patch is another common problem. Filler alone cannot provide structural support for a wide opening, and a lightweight mesh patch may not be appropriate for extensive damage. For dependable large drywall repair, use a replacement piece with proper backing whenever the opening requires it.
Do not rush the process by applying primer or paint before the repair materials have dried. Follow the instructions for each product, as drying times vary with the material, temperature, and humidity. Premature finishing can affect adhesion and leave visible defects.
Finally, investigate repeated cracking, crumbling drywall, or recurring water stains instead of treating them as ordinary surface damage. The underlying cause may need to be corrected before the wall can be repaired successfully.
Conclusion
Learning how to fix a hole in drywall step by step allows you to choose a repair method that matches the damage. Small nail and screw holes can usually be filled with spackle, medium-sized openings may be suitable for mesh patches, and holes larger than six inches often need a replacement drywall piece supported by backing or framing.
A successful repair depends on removing damaged material carefully, using suitable patching materials, and finishing the surface properly. Allowing each layer to dry, smoothing the joints, and applying primer before paint will help the repaired area blend into the wall. If moisture, hidden utilities, or damaged framing are involved, address those issues before completing the repair.
Frequently Asked Question
1. How to fix a hole in drywall step by step?
Clean the damaged area, fill small holes with spackle, and use a suitable patch or replacement drywall for larger openings. Sand the dried compound, apply primer, and finish with matching paint.
2. How do you fix a hole in drywall bigger than 6 inches?
Cut away damaged drywall, install backing strips if needed, and fit a replacement piece into the opening. Secure it with screws, tape the seams, apply joint compound, and finish with primer and paint.
3. Can you patch a large hole in drywall with mesh?
Mesh patches work for suitable small and medium-sized holes, depending on the product’s size limits. Larger openings generally need a replacement drywall piece with proper support for a stronger repair.
4. What is the best product for drywall small hole repair?
Spackle is suitable for small nail holes and shallow dents, while joint compound can be used for various drywall repairs. Choose a product designed for the size and depth of the damage.
5. What is included in a drywall patch kit?
A drywall patch kit often includes an adhesive mesh or metal-backed patch and may contain joint compound or application tools. Check the package to confirm which materials you need to purchase separately.
6. How many coats of joint compound are needed for drywall repair?
Most repairs need two or more thin coats, depending on the hole size and surface condition. Allow each coat to dry as directed before sanding or applying another layer.
7. Do you need to use primer after repairing drywall?
Yes, applying drywall primer helps prevent the repaired area from absorbing paint unevenly. Let the primer dry before painting to achieve a smoother, more consistent finish.
8. Why does a drywall repair crack after painting?
Cracks can develop because of insufficient drying, poor joint preparation, movement in the wall, or an underlying moisture problem. Correct the cause before repairing the area again to help prevent recurring damage.
Want more DIY and repair ideas? Explore helpful tips and the latest trends on TrendsMore.com.