



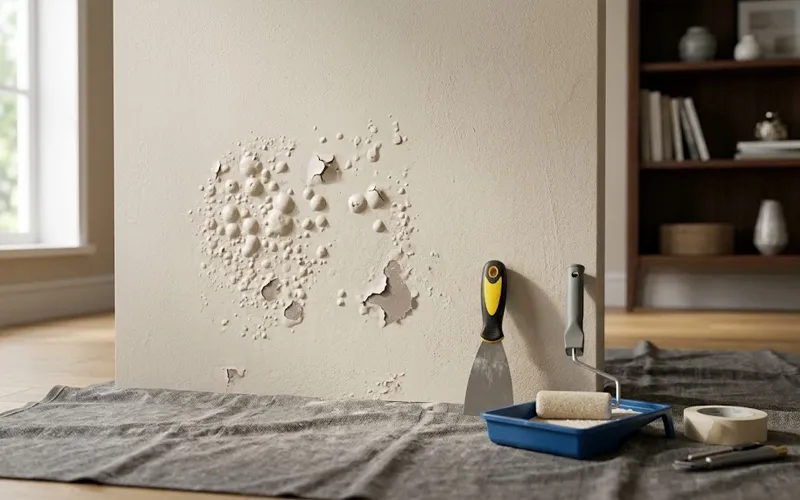
Paint bubbles on walls can make a freshly decorated room look untidy, even when the rest of the surface is in good condition. You may notice small raised spots, blisters, or areas where the paint seems to lift away from the wall. Sometimes they appear shortly after painting, while in other cases, they develop after years of looking perfectly normal.
The good news is that you usually do not need to repaint the entire room to fix the problem. The right repair depends on what caused the paint to bubble in the first place. Moisture, poor surface preparation, trapped air, and incompatible paint layers can all contribute to the issue. Once you identify the cause, you can repair the damaged area and restore a smooth finish without wasting paint or money.
What Causes Paint Bubbles on Walls?
Before starting any repair, take a close look at the affected area. The size of the bubbles, their location, and when they appeared can help you understand what went wrong. Removing the damaged paint without addressing the underlying problem may only lead to the same issue returning.
Moisture Behind the Paint
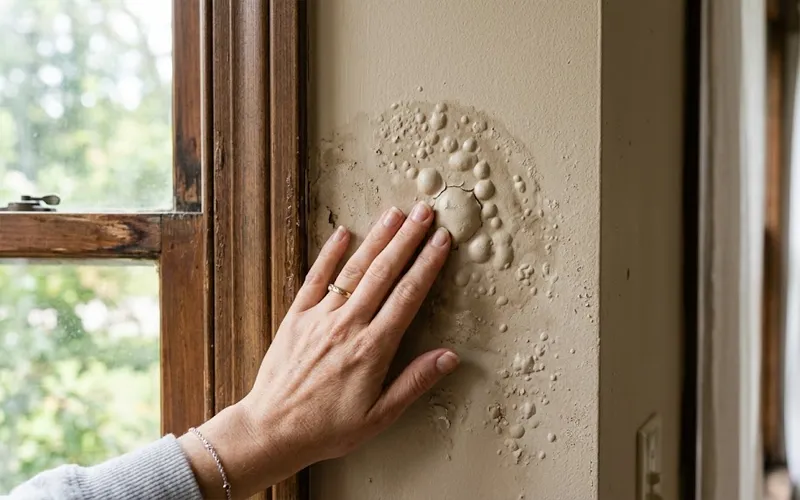
One of the most common reasons for paint bubbles on walls is moisture trapped beneath the paint film. Water can enter through leaking pipes, damaged exterior walls, roof problems, or gaps around windows. As moisture builds up, it weakens the bond between the paint and the surface, causing the paint to lift.
Paint bubbles on wall from moisture often appear near ceilings, windows, plumbing fixtures, or the lower sections of walls. You may also notice damp patches, peeling paint, discoloration, or a musty smell. If these signs are present, find and repair the source of the water before attempting to repaint.
Painting Before the Surface Is Ready
Paint needs a clean, dry, and properly prepared surface to adhere well. If you paint over dust, grease, loose paint, or a damp wall, the new coating may not bond properly. Applying paint over an incompatible old finish can also cause adhesion problems.
Bubbles can even develop when the previous coat has not dried sufficiently before another coat is applied. Following the drying and recoating times printed on the paint container helps prevent this problem.
Heat and Poor Painting Technique
Painting in very hot conditions or under direct sunlight can cause the outer layer to dry faster than the paint underneath. When moisture or air becomes trapped, the surface may develop blisters. Using a roller too aggressively or applying an unsuitable paint thickness can also contribute to an uneven finish.
If you notice bubbles forming while working, stop and check the conditions rather than continuing to apply more paint. The cause is easier to correct before the entire wall has been covered.
How to Fix Paint Bubbles on Walls
Once the cause has been identified and corrected, you can repair the damaged area. For a small patch, the process usually requires a scraper, sandpaper, suitable filler, primer, and matching wall paint.
Step 1: Remove the Loose Paint
Start by allowing the wall to dry completely if moisture was involved. Place a dust sheet below the damaged area, then use a paint scraper or putty knife to remove the loose and blistered paint. Work gently so you do not damage the surrounding surface.
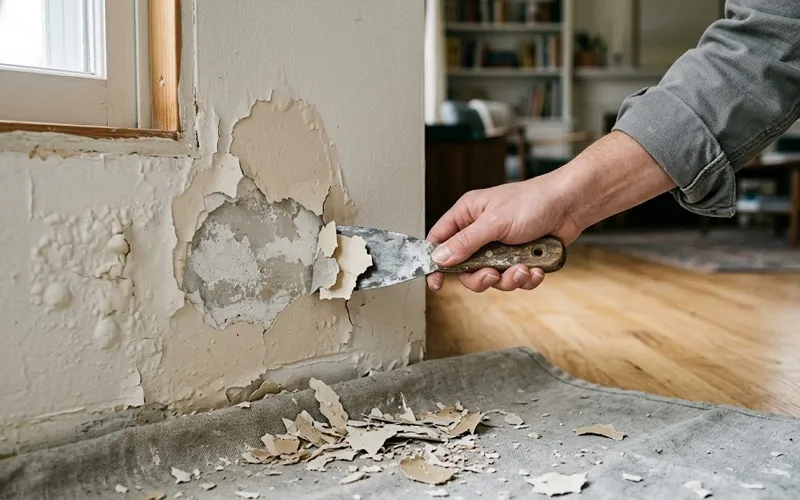
Continue until you reach paint that is firmly attached to the wall. Do not simply press the bubbles flat or paint over them, because the weak layer underneath will remain. If the paint keeps peeling away across a large area, the surface may need more extensive preparation.
Step 2: Check the Wall for Damage
After removing the loose coating, inspect the exposed surface. Look for damp plaster, soft drywall, crumbling material, mold, or cracks. A wall that feels unusually soft or continues to show signs of moisture needs further attention before cosmetic repairs can begin.
If the wall is sound and dry, brush away loose dust and prepare the surface for filling. Where mold is present, address the moisture source and clean the affected area using an appropriate method. Extensive mold growth or persistent dampness may require professional help.
Step 3: Smooth the Damaged Area
Use fine-grit sandpaper to smooth the edges where the remaining paint meets the exposed wall. The aim is to create a gradual transition rather than leave a sharp ridge that will show through the new finish.
If removing the bubbles has left shallow dents or small imperfections, apply a suitable wall filler in thin layers. Let it dry according to the manufacturer’s instructions, then sand it gently until the surface feels even. Remove all sanding dust before moving to the next step.
Step 4: Apply a Suitable Primer
Primer helps create a consistent surface and improves adhesion between the repaired wall and the new paint. Choose a primer suitable for the exposed material and the type of paint you plan to use. If the repair involves stains or previous moisture marks, a stain-blocking primer may be necessary after the source of the moisture has been resolved.
Allow the primer to dry fully before painting. Skipping this step can lead to uneven coverage or poor adhesion, particularly where bare plaster or filler is exposed.
Step 5: Repaint Only the Repaired Area
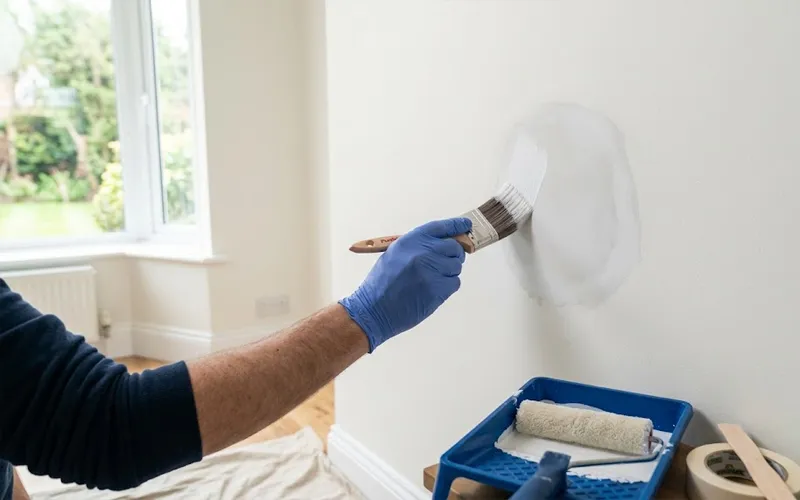
Stir the paint thoroughly and apply it in thin, even coats using a brush or roller suited to the wall’s texture. Allow each coat to dry for the recommended time before applying another. Avoid repeatedly rolling over paint that has started to dry, as this can disturb the finish and create new bubbles.
Matching the existing paint is important if you want to avoid repainting the entire room. Use the original paint colour and finish if available. Keep in mind that older paint may have faded, so a small test patch can help you check the match before finishing the repair.
In some cases, the repaired area may still look slightly different because the surrounding paint has aged. If the patch remains noticeable after drying, painting the full wall from corner to corner will usually produce a more consistent appearance than repainting the entire room.
Why Is Paint Bubbling on a Wall After Years?
Paint bubbling on wall after years can be surprising, especially when the wall previously looked smooth. However, paint does not remain unaffected by changes in the building. A small plumbing leak, deteriorating exterior sealant, rising damp, or increased indoor humidity can gradually weaken the bond between the paint and the wall.
Older paint may also begin to separate when a new coating is applied over a poorly bonded layer. If bubbles appear in an older room, inspect the wall carefully rather than assuming the paint has simply reached the end of its life.
The timing of the damage provides a useful clue. Bubbles that appear after rain may point to water entering through the roof, exterior masonry, or window seals. If the problem repeatedly appears in the same location, investigate that area before carrying out another repair.
What to Do About Paint Bubbling After Rain
Paint bubbling on wall after rain deserves particular attention because it may indicate water entering from outside. Check the exterior wall for cracks, damaged sealant, leaking gutters, blocked drainage, or gaps around windows. Water can travel behind a wall’s surface, so the visible bubble may not be directly beside the entry point.
Do not seal the damage with fresh paint while the wall is still damp. Allow the affected area to dry and arrange any necessary repairs to the building. If the wall remains wet, the plaster is crumbling, or the damage keeps returning after rainfall, consider getting a qualified professional to investigate the source.
How to Prevent Bubbles When Painting Again
Good preparation is the most reliable way to prevent paint bubbles on walls from returning. Before painting, remove loose paint, clean the surface, repair imperfections, and make sure the wall is completely dry. Use the correct primer and choose paint that is suitable for the room and the underlying material.
In bathrooms, where steam and humidity are common, use paint designed for damp indoor environments and maintain adequate ventilation. An exhaust fan, an open window when practical, and prompt attention to leaks can help reduce moisture buildup.
If bubbles develop while using a roller, check whether the paint is being applied too thickly or whether the roller is being pressed too hard against the wall. Work at the temperature recommended on the paint label and allow each coat to dry properly.
Can Paint Bubbles Be Fixed Without Repainting the Entire Room?
Yes, small damaged areas can often be repaired without repainting the entire room. Remove the loose paint, correct the underlying cause, smooth the surface, apply primer, and repaint the affected patch. This approach works best when the surrounding paint is still firmly attached and the new colour matches the existing finish.
However, if bubbling covers a large section, affects several walls, or keeps returning, a patch repair may not be enough. Extensive peeling, soft plaster, persistent dampness, and recurring stains can indicate a deeper problem. Fixing that issue first will give you a more durable result and reduce the chance of repeating the same work.
Final Thoughts
Paint bubbles on walls do not always mean you need to start decorating from scratch. In many cases, careful preparation and a small repair are enough to restore the surface. The important part is understanding why the paint lifted before covering the damage with a fresh coat.
Check for moisture, remove every loose section, prepare the exposed surface, and use the right primer and paint. Taking these steps will help the repaired area blend in more naturally and make the finish last longer. If the damage keeps returning, investigate the underlying wall condition rather than relying on repeated cosmetic repairs
Frequently Asked Questions
1. What causes paint bubbles on walls?
Paint bubbles on walls are usually caused by moisture, poor surface preparation, excessive heat, or applying paint before the previous coat has dried. Identifying the cause helps prevent the bubbles from returning.
2. How do you fix paint bubbles on walls without repainting the entire room?
Remove the loose paint with a scraper, sand the edges, fill any damaged areas, and apply a suitable primer. Once the surface is dry, repaint only the repaired patch using matching paint.
3. Can moisture cause paint bubbles on walls?
Yes, moisture can weaken the bond between paint and the wall, causing bubbles and peeling. Check for leaking pipes, roof damage, or water entering through windows before repairing the affected area.
4. Why are paint bubbles appearing on my wall after years?
Paint bubbles may appear years later because of hidden leaks, rising damp, high humidity, or deteriorating paint layers. Inspect the wall for damp spots, discoloration, and peeling to identify the possible cause.
5. How do you fix paint bubbles on walls after rain?
Allow the wall to dry completely and check for damaged exterior seals, cracks, or leaking gutters. Repair the water entry point before removing loose paint, applying primer, and repainting the damaged area.
6. Should you pop paint bubbles before repairing a wall?
You do not need to pop the bubbles first. Use a scraper or putty knife to remove the blistered and loose paint until you reach a firmly attached layer, then prepare the surface for repainting.
7. Can you paint over paint bubbles on walls?
No, painting directly over bubbles is not a reliable solution because the loose paint underneath can continue to peel. Remove the damaged coating, correct the underlying problem, and prime the surface before applying fresh paint.
8. How can you prevent paint bubbles on walls from coming back?
Keep the wall dry, fix leaks, remove loose paint, clean the surface, and use the correct primer. Apply thin, even coats of suitable paint and allow each coat to dry according to the manufacturer’s instructions..
Want more garden ideas and tips? Explore helpful ideas and the latest trends on TrendsMore.com.